No More Backlash

After milling my spoilboard, I noticed that the 10mm holes were just 9.7mm, which is a pain in the butt because I planned to put 10mm dowels in there. After checking all axes, I felt considerable backlash in all of them. After cursing, because there are just a few dozen hours on the machine, I ordered 4 of the adjustable t-nuts and spent way too many hours installing them. I also noticed that one of the y-axis lead screws had an irregularity, which kept me from setting the adjustable t-nut as tight as I wanted to. I was able to reduce it by carefully sanding the lead screw with fine sandpaper wrapped around a small file. After polishing the location, I decided to live with the small backlash that I was still able to feel.
After reassembly I was very happy, since my steppi never ran smoother. The fresh grease may have helped, as did the careful setting of pressure on all rollers. To check for the current status of backlash, I found a nice PDF that had some information and instructions on how to configure the software for backlash compensation:
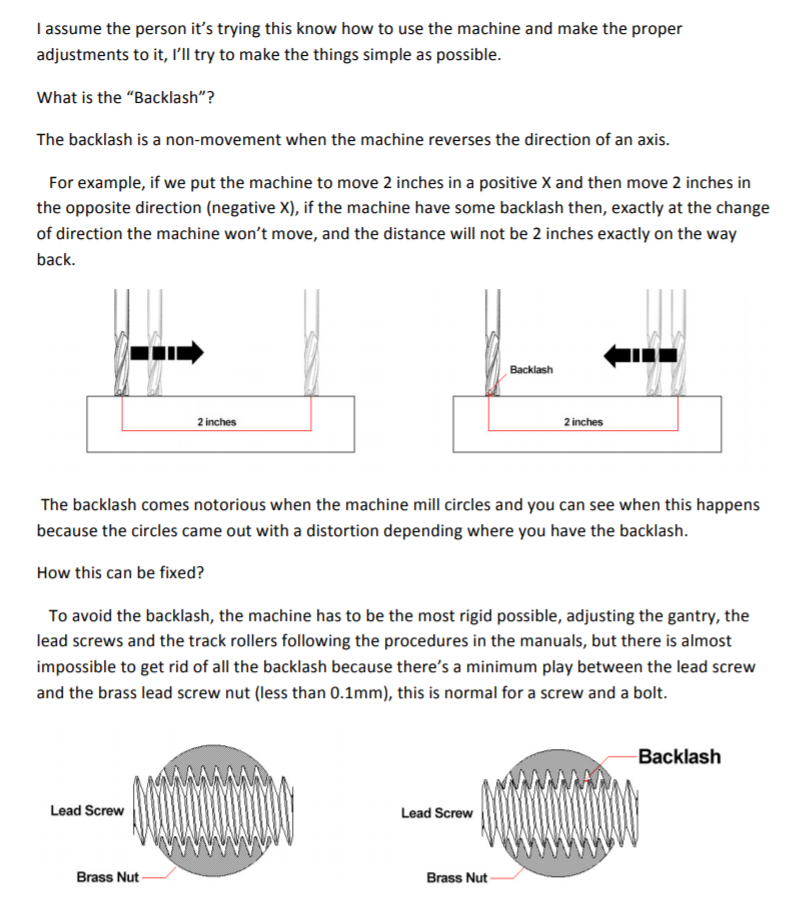
The instructions describe the geometry that is helpful when configuring the backlash in the UCCNC software which I also use. This is a possible result of using the CNC as a plotter (with a pen instead of the drill). The pairs of circles have a distance of 1mm, and they are plotted in opposite directions:
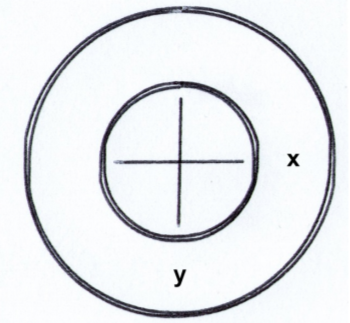
I fired up Fusion 360, and created the pattern. I expected something similar to the catastrophe seen above, but I got this nice result on the first try:
I still suck at machining, so the lines in the centers are not perfect, it is not the fault of the machine. The pen also missed to make a mark at the first part, I wish I had taken a second picture.
All that matters is that the circles have a constant distance to each other. I plan to repeat that drawing every once in a while to check on the situation of backlash.
Recent Comments