The First Spoilboard
I decided to get an aluminium T-slot table, since it seems the perfect way to mount the spoil board and to enhance the stiffness of the whole router. There seem to be at least two options for my StepCraft 600: the original accessory https://shop.stepcraft-systems.com/t-slots-aluminium-table-600 and the beefier https://www.sorotec.de/shop/T-slot-plate-for-Stepcraft-600-6794.html, which is 3mm thicker, and has less deflection under load, and can be properly set with some screws.
I planned to add a spoilboard, but noticed that the grooves do not open up at the ends, so how am I to mount the spoilboard? Instead of googling for a solution, I came up with my own (google is for p*ssies). I also found a way to make it larger than the actual working area of the router.
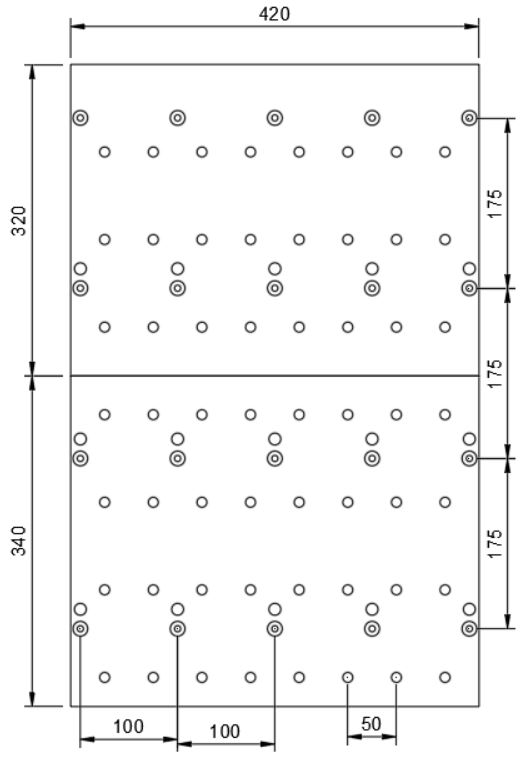
The spoilboard is 420 x 660 mm, while the working space is only 420 x 600 mm, with a clamping surface is just 432 x 680 mm. The solution was to align it parallel to one side using a 5mm strip wood, increasing the soft limit in UCCNC by 2mm, and finally milling the holes in two steps: First the front, and then the back while keeping the X setting. Worked fine.
I added a grid of 10mm holes to align the work pieces with pegs. I drilled them completely through the 18mm MDF, which was probably a bad idea, because it will scratch my beautiful aluminium T-slot table…
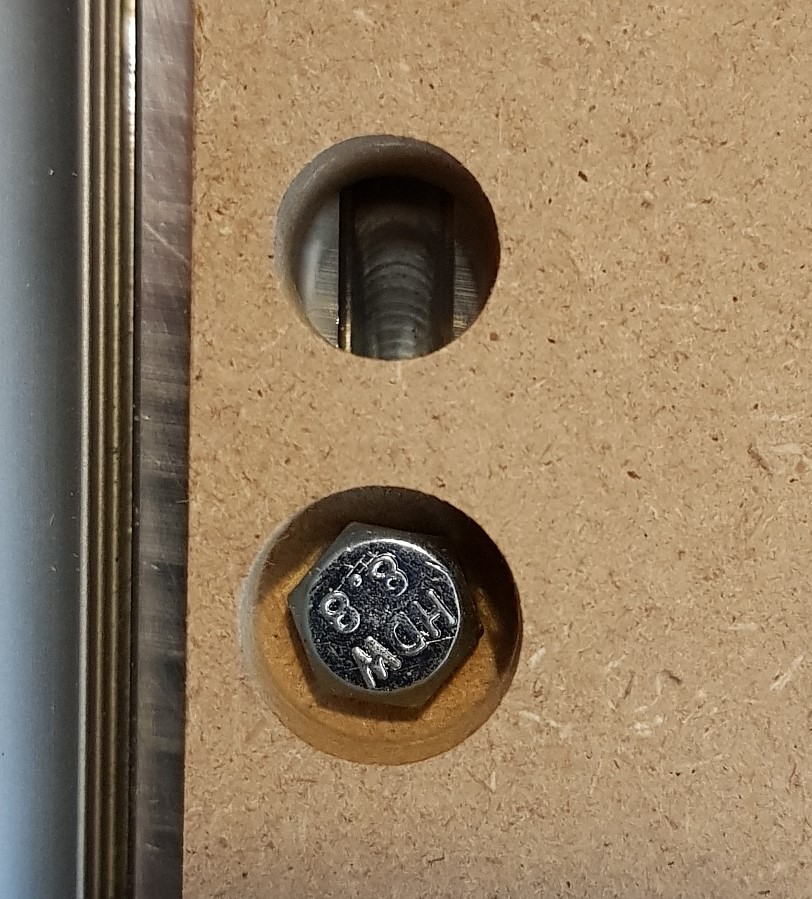
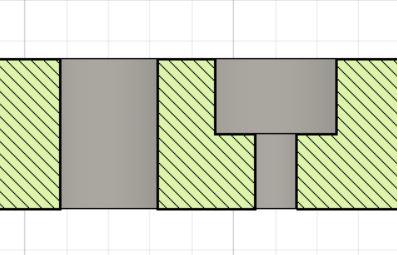
To mount the spoilboard, I start by putting 5 nuts into the large openings, which I have oriented at the maximum Y coordinate, and put the top row of the screw holes in the spoil board on top of it. After carefully inserting the 16mm screws into the holes (The screw holes are the ones having two concentric circles), I fasten them with 2-3 turns. Then I slide the board one row further, and insert nuts through the holes in front (image above: on top) of the scew holes with the help of a threaded rod. After moving the board over the nuts, and aligning the nuts carefully with a tweezer, I fasten them again lightly before sliding the board to the next row of holes. It is advisable to check if the screws have gone into the nuts before proceeding with the next row, so no screw is left without a nut.
After these arduous steps have been completed, all screws can be fastened. Next task is flattening the spoil board, which will require multiple steps again, because the board is larger than the workable area. I am not sure I wasted a lot of time here…
At least nothing will make that support sag!
PS.: The most obvious disadvantage of this spoilboard is that I cannot create and mount it while it is inside my SteppiBox . Next time I may go for a smaller one!
Recent Comments